

How to Test a Refrigerator Door Gasket for Air Leaks
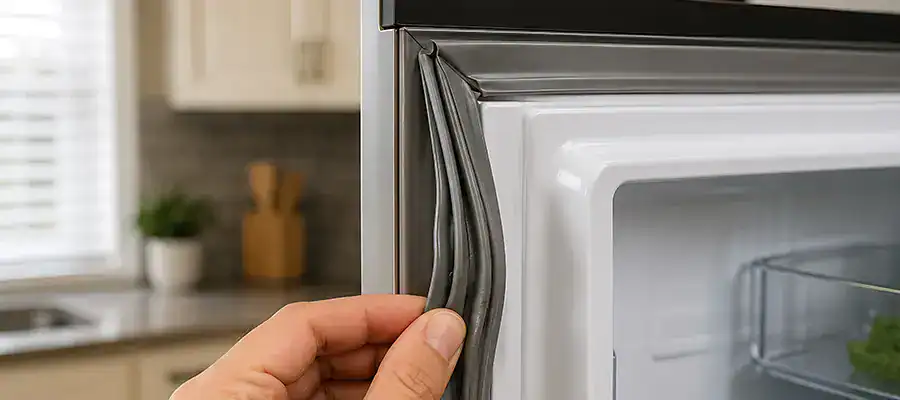
A failing refrigerator seal sneaks up on you: your food stays cold, but your energy bill quietly skyrockets. Fortunately, you can test your door gasket in under five minutes with nothing more than a dollar bill.
Here’s how to spot air leaks, check your seal, and fix the problem before it costs you.
What Is a Refrigerator Door Gasket & Why Does It Matter?
The door gasket is the flexible rubber or magnetic seal that runs around the perimeter of your refrigerator and freezer doors. It keeps cold air in and warm air out.
When the gasket wears out, warps, or cracks, the fridge has to work harder to maintain the temperature. That extra strain:
- Increases your monthly energy costs
- Shortens the lifespan of the compressor
- Causes inconsistent cooling and potential food spoilage
In Southern California’s warm climate, where ambient temperatures stay high year-round, a leaking gasket puts even more strain on your appliance.
How to Test a Refrigerator Door Gasket: 4 Reliable Methods
1. The Dollar Bill (Paper) Test
This is the most widely used DIY test, and the most reliable for a quick diagnosis.
- Place a dollar bill (or a folded piece of paper) halfway between the door and the fridge frame
- Close the door completely
- Try to pull the bill out with steady, even pressure
- If it slides out easily, the seal isn’t creating enough resistance—the gasket is likely failing
- If you feel real friction, the seal is working as it should
Repeat this test at multiple points around the door—top, bottom, left side, right side, and all four corners. A gasket can fail in one spot while staying intact everywhere else.
2. The Flashlight Test
This method works best in a dimly lit room.
- Place a working flashlight inside the refrigerator, pointed toward the door seal
- Close the door
- Turn off the kitchen lights and walk around the door perimeter
- Look for any visible light escaping through the seal
Even a thin sliver of light confirms an air leak. Pay close attention to the corners—that’s where gaskets tend to degrade first.
3. The Hand Test
Simpler than the flashlight test, but less precise.
- Run the back of your hand slowly along the entire door gasket while the fridge is closed
- Feel for any cool air escaping outward
- On a warm Southern California day, the contrast between room temperature and escaping cold air is easy to detect
This works better in the summer months when the ambient temperature is higher.
4. The Visual Inspection
Before you run any test, take a close look at the gasket itself.
- Check for cracks, tears, or hardened sections in the rubber
- Look for areas where the gasket has pulled away from the door frame
- Look for mold or mildew buildup (a sign the seal isn’t tight)
- Press the gasket flat against the door and release. Healthy gaskets spring back quickly; stiff or flattened gaskets have lost their elasticity
What to Do If the Gasket Is Failing
If any of the tests above reveal a leak, you have two options:
Option 1: Clean and Restore the Gasket
Sometimes, a gasket fails simply because it’s dirty or slightly warped, not fully deteriorated. Try this first:
- Wipe down the entire gasket with warm, soapy water
- Dry it thoroughly
- Apply a thin coat of petroleum jelly to restore flexibility
- Close the door and leave the fridge undisturbed for a few hours
Re-run the dollar bill test afterward. If the seal has improved, cleaning may have solved the problem.
Option 2: Replace the Gasket
If the gasket is cracked, torn, or hard, it needs to be replaced.
Replacement gaskets are available at most appliance parts stores and are specific to your fridge’s make and model. Most homeowners with intermediate DIY experience can complete the swap in under an hour.
- Look up your refrigerator’s model number (usually inside the door frame or on the back panel)
- Order the correct replacement gasket
- Soak the new gasket in warm water before installation to make it more pliable
- Remove the old gasket by pulling it away from the door liner and pressing the new one into the groove
How Often Should You Check the Door Gasket?
A good rule of thumb for homeowners:
- Every 6 months: Run the dollar bill test as part of routine appliance maintenance
- After a power outage or storm: Fluctuating temperatures can make gaskets temporarily warp
- When your energy bill spikes unexpectedly: A failing gasket is a common culprit
- When you notice condensation inside the fridge: That’s a strong sign warm air is getting in
FAQs: Testing a Fridge Gasket
Q: How do I know if my refrigerator door gasket is bad?
The easiest way is the dollar bill test: place a bill in the closed door and try to pull it out. If it slides out with no resistance, the gasket is failing. Visible cracks, mold on the seal, or a rising energy bill are also signs of a bad gasket.
Q: Can a bad refrigerator gasket increase my energy bill?
Yes. A leaking gasket forces the compressor to run longer to maintain the set temperature. Over time, this can meaningfully increase electricity costs, especially in warmer climates, where ambient temperature increases demand on the fridge.
Q: How long do refrigerator door gaskets last?
Most refrigerator door gaskets last between 5 and 10 years, depending on usage, cleaning habits, and how often the door is opened. Gaskets in warmer homes tend to degrade faster due to repeated temperature cycling.
Q: Can I fix a refrigerator door gasket without replacing it?
Sometimes. Cleaning the gasket with warm soapy water and applying petroleum jelly can restore flexibility and improve the seal on a gasket that’s slightly warped or dirty—but not one that’s cracked or torn. If the rubber has hardened or split, replacement is the only reliable fix.
Q: Is it hard to replace a refrigerator door gasket?
It’s a manageable DIY task for intermediate-level homeowners. You’ll need to remove the old gasket, order the correct replacement for your fridge model, and press the new gasket into the door liner. Soaking the new gasket in warm water beforehand makes it easier to work with.
Q: Where can I buy a replacement refrigerator door gasket in Southern California?
Most appliance parts stores carry them, and many big-box home improvement stores stock common models. You can also order directly from the manufacturer or through appliance parts websites using your fridge’s model number.
Q: How do I find my refrigerator’s model number to order the right gasket?
The model number is usually on a sticker inside the refrigerator door frame, on the interior side wall, or on a plate on the back of the unit. Write it down before ordering to ensure you get the correct fit.
Q: Can a bad gasket cause food to spoil faster?
Yes. When warm air enters the fridge through a leaking seal, the internal temperature rises, even if the thermostat reading looks normal. This can accelerate bacterial growth and cause food to spoil before its expiration date.
More Articles
0 Comments