

How to Replace a Front-Load Washer Door Seal
If your front-load washer smells like a swamp or leaves a mystery puddle on the floor, it’s sending you a message — your door seal (also called a gasket or boot) has thrown in the towel.
But you don’t need to call a repair tech just yet. Replacing the seal yourself is a manageable DIY project that can restore your washer to its like-new performance.
This guide gives you a comprehensive overview, covering everything you need to know, including the necessary tools, a step-by-step process, and answers to common questions. A little time and patience can save you a costly service call and extend the life of your washing machine.
Why Front-Load Washers Have Seal Issues
Front-load washers have many advantages — they’re energy-efficient, can handle bulky items, and stack easily. However, they’re also prone to mold and mildew due to their design.
Here’s why:
- Trapped moisture: The tight rubber seal keeps water in, but it also retains moisture after each wash.
- Limited airflow: Since the door seal shuts tightly, there’s minimal air circulation, resulting in a damp environment.
- Soap buildup: Detergent and fabric softener residue can cling to the seal, allowing mold and bacteria to grow.
Step 1: Find the Right Replacement Part
Before you can begin, you’ll need the correct door seal for your washer model.
- Locate your washer’s model number; it is usually found inside the door, on the back, or underneath the lid.
- Once you have the model number, order the exact replacement part from an appliance parts store or an online supplier.
Getting the right part upfront saves you time and frustration later.
Step 2: Gather Your Tools and Get Set Up
A trouble-free repair starts with thorough preparation. Make sure your workspace is well-lit and organized, and gather all the tools and materials you need.
Tools & Materials
- New washer door seal (for your specific model)
- Phillips and flat-head screwdrivers
- Spring-expansion tool or needle-nose pliers
- Socket wrench or nut driver set
- Towels or rags
- Small bowl or container for screws
- Mild soap and water
- Work gloves (optional, but helpful)
Step 3: Safety First – Unplug the Washer and Turn Off the Water
- Unplug your washer from the wall outlet.
- Shut off the water supply by turning both the hot and cold valves clockwise until they are fully closed.
This will prevent you from getting a nasty electric shock and eliminate unwanted leaks while you work.
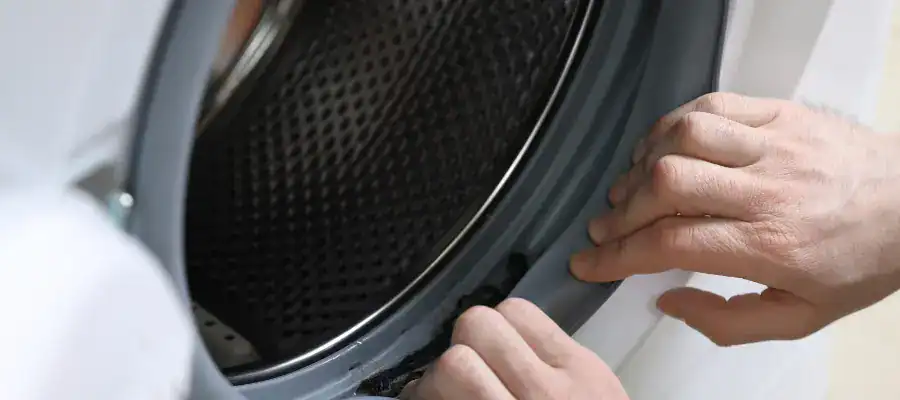
Step 4: Remove the Old Door Seal
The seal is held in place by two clamps, one on the outside and one on the inside.
1. Remove the outer clamp.
Look just inside the washer’s front panel for a thin wire with a spring. Use a flat-head screwdriver or needle-nose pliers to gently expand the spring and lift the clamp from its groove. Set it aside.
2. Peel back the old seal.
Once the outer clamp is off, pull the seal away from the front panel and tuck it inside the drum to reveal the inner clamp.
3. Remove the inner clamp.
The inner clamp holds the seal to the drum itself and may require removing the washer’s top or front panel for easier access (depending on the model). Use your pliers or socket wrench to loosen the tension screw or spring, then remove it carefully—these clamps can be tight!
4. Take out the old seal.
Once both clamps are off, pull the seal free. Pay attention to how it’s positioned. Many seals have a small drain hole that must line up at the bottom when you install the new one.
Step 5: Clean the Machine
Now is the time to give your washer a good cleaning.
- Wipe down the drum lip and inside of the front panel using mild soap and water.
- Remove any gunk, detergent residue, or visible mold.
Be thorough in your cleaning, removing any gunk, detergent residue, or visible mold. A clean surface is key to a successful seal replacement, allowing it to fit snugly with no leaks.
Step 6: Install the New Door Seal
This part takes a little patience, but it’s completely doable.
1. Align the seal.
Check for alignment marks or drain holes. These usually go at the top and bottom of the opening.
2. Attach it to the tub.
Fit the inner lip of the seal around the drum’s groove, pressing it in firmly all the way around.
3. Secure the inner clamp.
This can be the trickiest step. Reinstall the clamp over the seal to hold it in place. Use a spring-expansion tool or pliers to stretch and guide it carefully into the groove.
4. Fit the seal to the front panel.
Pull the front edge of the seal over the washer’s front lip. Make sure it’s smooth and evenly seated.
5. Reinstall the outer clamp.
Work the clamp around the seal and snap the spring into place with pliers. Double-check that it’s tight and secure.
Step 7: Reassemble and Test
- Reattach any panels you removed, plug the washer back in, and turn the water back on.
- Run a short rinse or drain cycle without clothes and check for leaks around the door. If it’s dry, congratulations! You’re done.
Step 8: Keep Your New Seal in Great Shape
To prevent mold and mildew from coming back:
- Wipe the seal dry after each wash.
- Leave the washer door slightly ajar to allow air to circulate.
A few simple habits can keep your washer smelling fresh and your new seal lasting for years.
FAQs: Replacing a Washer Door Seal
Q: How do I know if my washer door seal needs replacing?
You’ll usually notice mold or mildew that won’t wash off, a musty odor, visible cracks or tears, or water leaking from the front of the washer.
Q: Is it hard to replace a washer door seal myself?
It’s a moderate DIY task. The inner clamp can be tricky, but with patience and the right tools, most homeowners can handle it.
Q: How much does it cost to replace a washer door seal?
Replacement seals typically cost between $50 and $200, depending on the brand and model. Hiring a professional can add $150–$300 in labor, so doing it yourself can save you a significant amount of money.
Q: Can I just clean a moldy seal instead of replacing it?
If the mold is only on the surface, try cleaning it with a bleach solution or washer cleaner. But if the rubber is cracked, damaged, or deeply stained, your best option is to replace it.
Q: How long should a washer door seal last?
If you keep it dry and clean after each use, a seal can last for many years, often as long as the washer itself.
Q: What tools will I need?
At minimum, you’ll need screwdrivers, needle-nose pliers, and a replacement seal. A spring-expansion tool is optional but makes the job easier.
Q: My new seal looks too small. Is that normal?
Yes! New seals are often tighter. Double-check that it’s the correct part number for your model, and if you need to, soak it in warm water for a few minutes to make it more flexible.
Q: My washer is still leaking after replacing the seal. Now what?
A leak usually indicates that the seal isn’t seated correctly or that the clamp isn’t tight enough. Recheck that both clamps are in their grooves and that the seal is flat and even. Also, inspect for any small tears or manufacturing defects.
More Articles
0 Comments